I’ve been experimenting with running Linux on Macs for some time and – for a variety of reasons – needed to make a clean install of Ubuntu 14.04 LTS on my early 2008 24″ iMac. The Mac is now on its last legs, and Mac OS does not run very swiftly on it – my aim is to run Ubuntu on it, and use it as a computer for watching TV and DVDs, and for web browsing for guests.
So here’s the guide as to how to get Ubuntu up and running.
First, third prerequisities. First there is no way to do this without using the command line – accessible through the Terminal app in both Mac OS and Ubuntu. It is a matter of copying and pasting the right commands – there is rather little need to fully understand what is going on. Command line is needed very seldom once Ubuntu is running, but is required for the setup. Second, the solution to more or less any Ubuntu on a Mac problem can be found by Googling around (probably the way you found this blog entry!) Third, you’re going to need an empty USB stick (at least 2Gb capacity) to make this work.
Step 1 – Make a Ubuntu bootable USB stick while running Mac OS
This is simple – follow the instructions here. Note that step 3 is not very well described – you will end up with a file called “ubuntu.img.dmg” that you will need to rename “ubuntu.img” by just renaming the file in the Mac OS finder. Simply copy and paste the relevant commands into Terminal.
Step 2 – Install rEFInd to allow dual booting
This presumes that you want to be able to boot your Mac in either Mac OS or Ubuntu, and to be able to switch between them. For this you will need a software utility called rEFInd. Its interface looks horrid, but it works. You can find instructions of how to install it from How To Geek here, and you can get the latest edition of the rEFInd software here. Before you start this connect your Mac to the internet with an ethernet cable – wifi will not work initially, and if you are connected to the internet then extra Ubuntu packages will be downloaded while you are installing it.
Please note that the final screen from the How To Geek piece can be inaccurate – for me there was no “install alongside Mac OS” option – I instead needed to choose “Something else” for the disk partitions, following the instructions here about how to set this up – putting / as the mount point for the main (60Gb size) ext4 partition, and 6Gb for swap. At the end of the installation process Ubuntu will ask you to reboot your machine.
Step 3 – Get the wifi working
Go to “System Settings” in the left apps bar in Ubuntu, then choose “Software & Updates”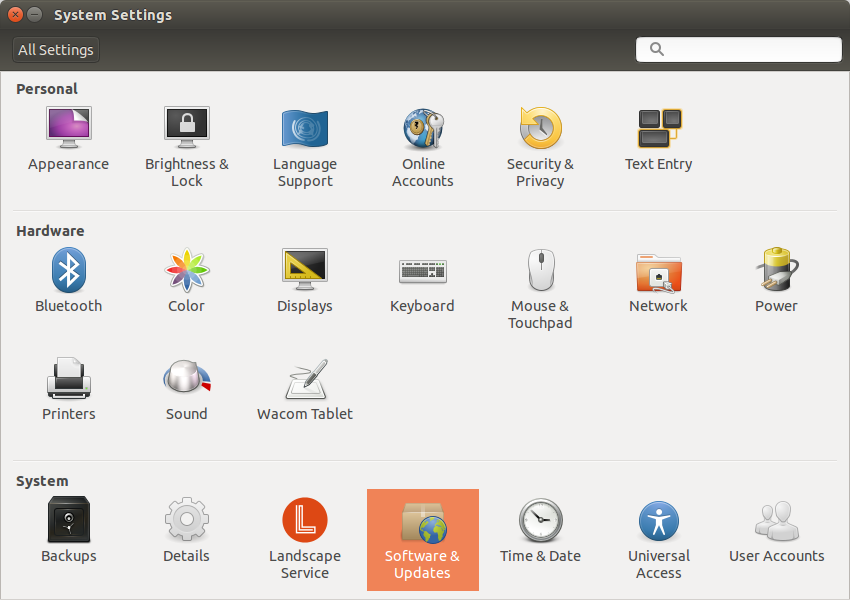
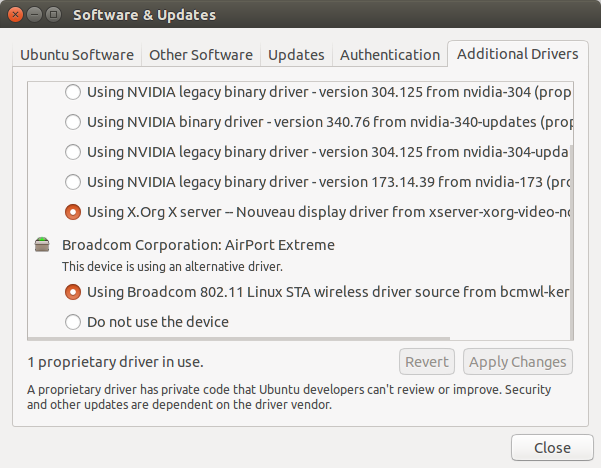
Then click “Additional Drivers” and select the Broadcom driver (note this is how it looks on an iMac – the driver manufacturer might be different on other Macs, but the procedure will be the same). You may need to restart before the wifi works.
Step 4 – Software updates
 Click the search button at the top left of the screen (shown here to the right), and type “Software Updater”. Run it, and it will download and update your installation.
Step 5 – Further software
You can install GIMP (equivalent of Photoshop), Dropbox, Kaffeine (for DVB), and VLC (for DVD playback) from the “Ubuntu Software Center” in the left apps bar. Some other apps are more complex – follow these instructions for Skype (and note I needed to use the Skype 4.3 on 15.04 instructions – including the extra instructions to get this to work). To install the ownCloud sync client follow these instructions (needs command line).
Step 6 – Peripherals
I have a Brother MFC-J4510DW printer-scanner – Brother’s linux support is a bit sketchy, but this series of commands did the job perfectly – just note that you need to find the local IP address of your scanner under Settings on the device itself. Note that Ubuntu defaults to letter size paper – you’ll need to set this to A4 in Printers in System Settings. I also use the pre-installed app Simple Scan for my scanning – works with either the flatbed scanner or the sheet feeder on the Brother device.
Step 7 – DVB and DVD playback
I have an old DVB TV tuner Stick – a Miglia TV Mini. This can be used with Ubuntu, using Kaffeine (see above) as the playback software and following this french language guide to get it installed (requires command line, and a restart). Extra installations are also required to allow Ubuntu to read movie DVDs – instructions for how to do this are here (command line and restart required) – and I use VLC for the playback.
Step 8 – Tunnelbear VPN
Instructions to get Tunnelbear working on Linux are here. Works simply enough!
Step 9 – number pad
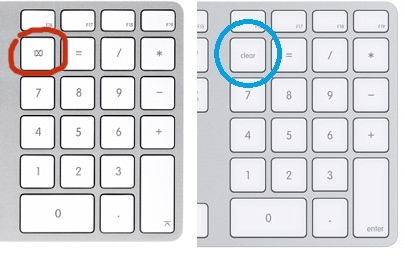
I had the issue that numbers on the number pad on the right hand side of my Mac keyboard were not working, and worked as arrow keys instead. To get them to work press the “Clear” button as shown (varies between US and European keyboards) – this has the same function in Ubuntu as the Num Lock key on a PC keyboard.


Werna Sorry. Once your Linux is installed the Broadcom driver should be available if you checked ‘Install extra drivers’ during installation. Once you switch to the Broadcom driver you can disconnect your Wifi USB or Ethernet.
Werna you need to either connect to Internet via Ethernet cable or do what I did and plug in a USB wifi stick.
I could’nt get the WIFI working with Lubuntu 18.04
Thanks for this guide, I’m gonna try this on a iMac. My mom asked me to sell it since it’s so old and doesnt update. I offered to install Ubuntu instead. Hope it works! 🙂